[n.b.: this is one page out of a series of pages which
will describe how I've implemented/adapted Getting Things Done into my
role as a teacher (grades 7 and 8); more pages will be added shortly]
Essential to my implementation of GTD is the so-called Ductster PDA.
It is a personal adaptation of the Hipster
PDA first described at the
excellent 43
Folders blog and essentially is a modified duct
tape wallet designed to hold index cards. Here's how to make your own:
 |
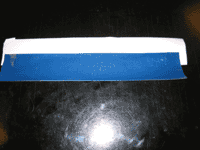
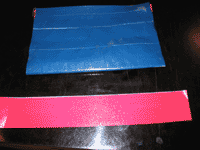
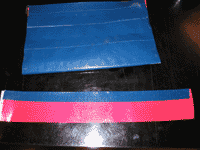
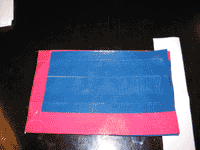
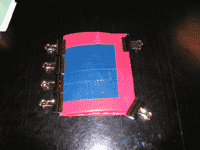
1. Cut 13 strips of duct tape, about 24 cm long each.
In this example, I'm making a blue wallet with a red border (apologies
for the flash glare). |
 |
2. Place one strip face up on your work surface (this
will be the top seam, so if you're doing a multiple-colour wallet,
pay attention accordingly). Place your second strip face down on
the first one, as close to 'half way' as you can get it. |
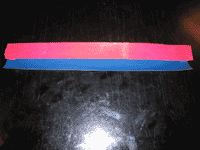 |
3. Fold the 'top' seam over (don't worry about the
sides at this point)
|
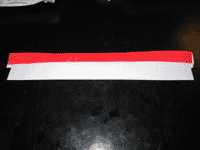 |
4. Flip it over, then stick another strip face down
on the exposed sticky bit. Try very hard to match your edges as closely
as you can and not leave any sticky bits explosed. If you find you
have to overlap a bit (i.e. like a millimeter), that's preferable
to leaving a 'river' of sticky bit showing.
|
 |
5. Flip it over, then put another strip face down on
the exposed sticky bit. |
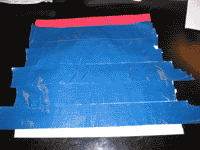 |
6. Keep doing this until you have used all 13 strips.
Fold the last piece over to form the 'bottom' seam of your Ductster
PDA. If you like, you can use the back of a spoon or a
ruler to smooth out any bubbles and/or bumps at this point. |
 |
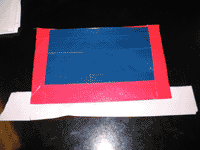
7. Trim the sides down so your
sheet of duct tape is 22 cm wide (a paper cutter works incredibly
well for this; second choice would be a utility knife and ruler;
scissors are a distant third) 24 cm long each. The straighter you
can do this, the better your final product will be. |
 |
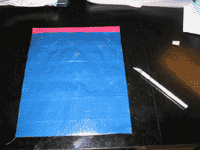
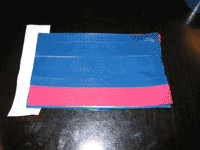
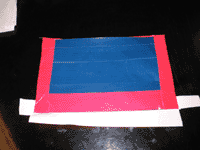
8. Take the sheet and fold the 'bottom' up to the top,
not quite even with the top, but .5 cm or so from the top. You can
even make it even with the top if you like, but it makes it a bit
easier to see/find that 'interior pocket'. You don't want the 'flap'
to be too large because (experience shows) it might get bent in your
pocket. |
 |
9. To make the 'everyday pocket', unroll a piece
of duct tape roughly 46 cm long then fold it back on itself (sticky
side
to
sticky side)
and
trim
the piece to
22 cm (or whatever your wallet is at this point). |
 |
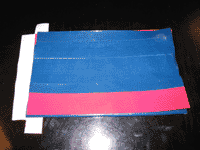
10. take a piece of duct tape 22 cm or so long and
tape it to this strip to form the top seam of your pocket. |
 |
11. The first step in assembling the thing is to
take the pocket you made in step 10 and line up the bottom of it
with
the
folded
part
of
the
'big
sheet'
(keep
in mind you
want the 'shorter' part of the sheet on the inside of your wallet).
Then take a strip of duct tape (red, in our example) to form one
of the seams on the sides. Look at the next photo before proceeding.
|
 |
12. Note how to cut the tape to give yourself 'hospital
corners'
and
make it look nice. It seems to work best to fold the small flaps
up/down first, then the long side flap. Smooth with the back of a
spoon for maximum adhesion. |
 |
13. This is what it should look like at this point. |
 |
14. Repeat for the other side. |
 |
15. Finally, attach the pocket using the same
basic method. |
 |
16. Don't forget your hospital corners. |
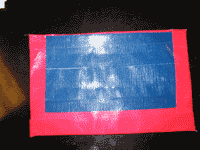 |
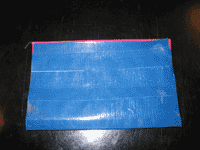
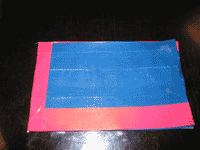
17. What you should have at this point. Depending on
how you've been cutting/tearing your duct tape, you might find some
'threads' sticking out. This is a good time to trim them away. |
 |
18. Your next step is to fold it in half. Depending
on the quality of the duct tape you used, you might find it useful
to put a bunch of binder clips along the 'binding' to help it get
its shape. (I'm still trying to figure out whether this step is really
necessary). |
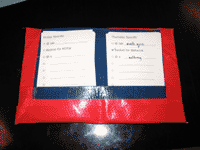 |
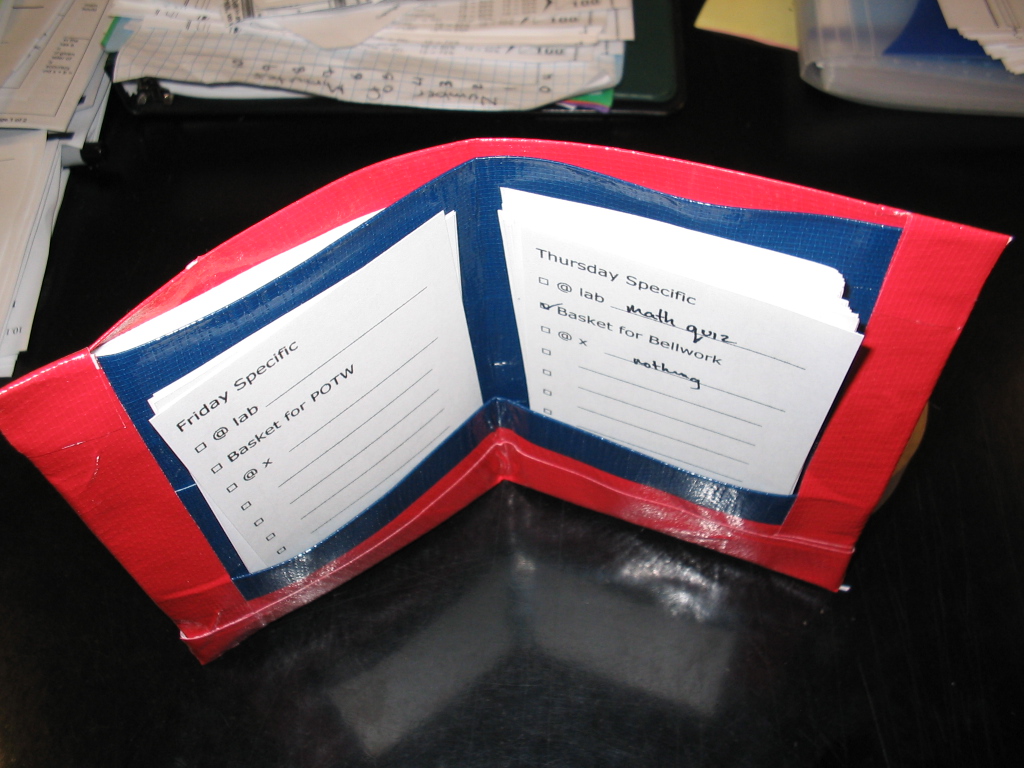
19. Put your index cards in the 'everyday' pockets
and fill up the other one as you see fit. |
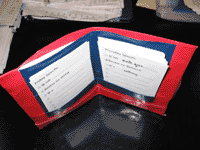
Click on the photo for a larger view |
Some preliminary comments (which will likely change
once I put up the other pages of Getting Things Done ... for teachers):
What I like about this thing (other than the fact that it is geekily
fashionable and fits nicely in your pocket) is that it provides
you with four 'pockets' which allow you to impose some organization
on your
cards.
E.g.,
in my current configuration (which is subject
to change), I use the right 'open' pocket for index cards with
the 'next actions' I hope to accomplish today (because I'm a teacher,
I have a number of repeating items that I have to do on specific
days ... I've created some 'templates' in WordPerfect for these
days and have printed out a number of index cards for specific
days). So, if today is Monday, I have my 'Monday Card' on the right,
plus any other cards/next actions I hope to deal with on Monday.
The left 'open' pocket is for the next day's 'template' (which
usually gets filled as 'today' progresses) followed by a bunch
of blank index cards and a few other templates (e.g. checklists
for each class for homework checking purposes; cards for contact
with parents, etc. ... not too many, mind you -- I have a bunch
of these in a small basket in my desk; they're in the Ductster
just in case I need to access them when I'm not in my room).
The 'big closed pocket' on the right is where cards go when I
have completed the action. I review them at the end of the day
to make
sure
I
didn't miss anything, run a big line through them and toss
them into a basket so I can use the other side for another task).
On the left side go cards with templates for larger tasks (I
try
to
fit all the steps of a project on one card; I've made a template
for that too) that I can chip away at as I get time. |
|